Alright, I'll admit, this month's challenge item totally had me stumped for a while. I had been thinking about it for weeks. What could I do beyond the obvious? I didn't want to make a cork board. I thought about making coasters or trivets, but those are readily available for purchase these days. I didn't want to use wine corks because that would mean destroying my collection and emptying my DIY wine cork storage bin. Then I remembered that winter is coming and I desperately needed to move my succulents indoors before the first frost! I end up needing to repot them every year, so now was the perfect opportunity. And so it was decided. I was going to use cork to make a succulent planter!
Welcome to November's Monthly DIY Challenge!!! If you've never visited before, each month my friends and I choose a challenge item and all come up with our own DIY to share! It's a lot of fun and is definitely a true challenge of our creativity sometimes!!! My friends came up with some awesome cork DIYs too, so make sure to check them out at the bottom of this post!!!
Here's how I made my simple cork wrapped succulent planter!
Materials:
-Glass jar (I found mine at Homegoods, but a lidded jar like this could work)
-Succulents (did you know you can order succulents on Amazon?!)
How to make a cork wrapped succulent planter:
I found this simple jar in the food storage section at Homegoods. Don't you just love Homegoods?! I could spend hours in there. Seriously.
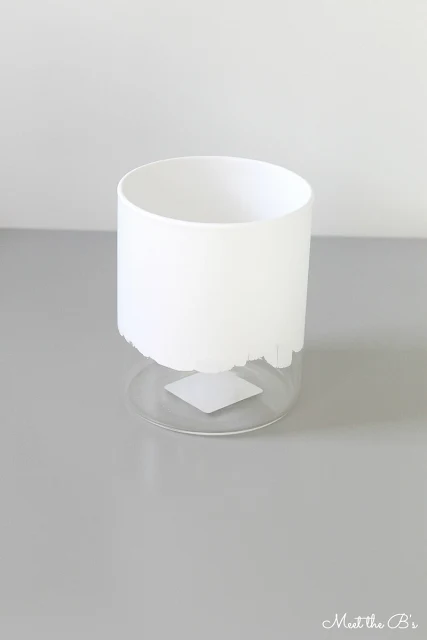
I gave the jar a quick cleaning with rubbing alcohol to remove fingerprints and dirt so that the paint would stick better. Then I gave it three coats of paint with acrylic white paint. You could also use paint intended for glass. I also painted a little bit inside of the rim of the pot since part of it would show above the soil.
Then I rolled out the sheet of cork and measured how tall I wanted my cork. I marked it with a pen and trimmed it with scissors. I wrapped it around the jar and marked it again to cut it the right length.
Next, I used super glue to apply the cork. I actually tried using hot glue first, but it kept popping off of the glass once dried. Super glue always solves all of my problems! Apply a line down each edge of the cork. Work quickly! It dries fast!

Then, I planted the succulents!!! I like to put gravel in the bottom of the planters, especially if there is no drainage hole. Succulents don't like to be saturated with water, so drainage is important. Gravel allows excess water to drain from the soil and collect in the bottom of the planter. Then I add potting soil and succulents!!!
I absolutely love succulents! I wish I could put them all over my house!! They are so easy to care for!!! These beauties are going on the dresser in the guest bedroom!
Ready for more cork inspiration? See my friends' cork projects below!
Want to see all of the past Monthly DIY Challenge projects? Click the button below!!!


Ya...I'm obsessed with this!
ReplyDeleteThese are so pretty, Nicole! Love how they turned out.
ReplyDeleteCute, cute, Nicole! Can you believe this could be your last post before baby arrives?!?
ReplyDeleteSuper cute Nicole! This would make the perfect addition to my office, if only I could keep my succulents looking as fabulous as yours.
ReplyDeleteThis turned out too cute. I love the simple lines (and how healthy your plants are... I still kill everything!) Great job, girl!
ReplyDeleteSo simple and so cute Nicole! I just may gave to make a few of these for my succulents!
ReplyDeleteThis is seriously gorgeous! I love the white paired with the textured cork - pure goodness. I wish my succulents looked like yours! ;)
ReplyDeleteOhh how I love this!! SO pretty, but yet so simple! And the green succulents pop against the white and cork! :)
ReplyDeleteI love this project, found it at I Heart Naptime's link party! Awesome job :)
ReplyDeleteWhat a fun project!!! I love it! Thanks for linking up to Link Party Palooza!!
ReplyDeleteSo easy and SO cute!
ReplyDelete