My favorite part of the month is here! The Monthly DIY Challenge is here! This month, my friends and I chose a theme of "Trash to Treasure." We each selected an item deemed as trash and opted to give it new life!!! I'm so excited for you to see what we've all come up with!
As you know, my husband and I have been working hard on our laundry room/pantry renovation! We tour down the cabinets in the old laundry room to make room for a doorway into the new laundry room.
Once we wear done tearing the cabinets from the walls, I felt guilty about their destiny at the dump. Look at this picture. Total dump material. Right? (Pardon the rest of the mess in our construction zone!)
They are great wooden cabinets! There must be something I could do!! So recently, I took the cabinet doors off the bases and got to work!
Materials:
-Old cabinet doors
-Screwdriver
-Stain or stain touch up marker
-Pencil
We've been looking for some art for our kitchen, and since these cabinets are the same color as our current kitchen cabinets, I thought, why not repurpose them as frames and make some kitchen art?
I removed the smallest two cabinet doors to use for my project.
First, I removed all of the hardware.
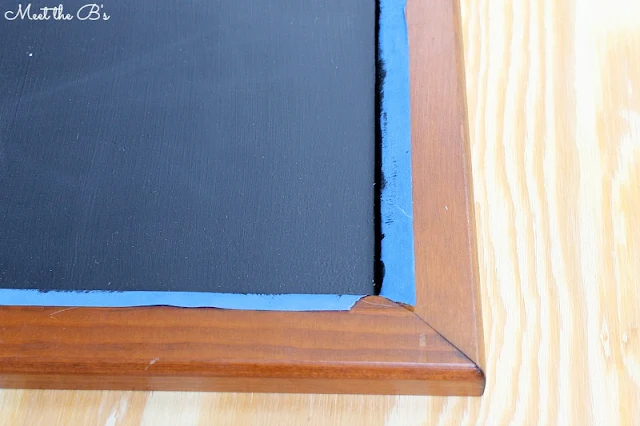
I taped off the edges with painter's tape and covered the cabinet with Rustoleum's chalkboard paint. I just used a paint brush, although the can recommends a roller. I think it turned out just fine!
Once dry, I removed the tape to reveal nice clean edges.
Then I seasoned the new chalkboard surface. To do this, run a piece of chalk on its side across the paint. Then wipe away with a cloth or paper towel.
Then I used my favorite text transfer method to add words to the top of the two boards. Check out my full tutorial.
Finally, I had to work on covering the holes left from the old hardware. This was the trickiest part.
First, I attempted to use a pre-stained wood filler. It didn't match at all and looked awful. Next, I used a regular wood filler and stained it myself. Apparently wood filler is pretty absorbant, so after about ten coats when the white was still showing, I gave up on that idea.
I found some great hardware to cover up most of the holes and used it to store chalk!!
Check out what kind of trash my friends got creative with!

>>> See where I link up each week! <<<
This post may contain affiliate links. Please see my disclosure policy.
This post may contain affiliate links. Please see my disclosure policy.


Brilliant idea Nicole! What a perfect way to re-use that door!
ReplyDeleteWhat a great way to reuse your old cabinets! I just can't get enough chalkboards in my life :) I love the idea of using a little pull handle as a chalk cup - genius!!
ReplyDeletecool! three cheers for trash to treasure! I really like the look you got by choosing the paint brush instead of the roller for that chalkboard paint.. reminds me of old school classroom chalkboards..
ReplyDeleteThis is so clever and I love the little handle used to hold the chalk! Awesome job Nicole!
ReplyDeleteGreat idea to repurpose the cabinet doors! It turned out so cute and I love the little chalk holder handle!
ReplyDeleteTotally adorable! I think it was a happy accident that the wood filler wasn't working for you, because the drawer pull chalk holder is fabulous! xo
ReplyDeleteGreat idea, Nicole! Love the added handle to hold the chalk!
ReplyDelete