It's monthly challenge time! If you're not familiar with our Monthly DIY Challenge, each month, a group of my friends and I choose an item to DIY with. We each come up with our own project using a similar item or theme. This month's challenge is fabric!
I'm still getting the hang of my sewing machine and am far from being a pro, so since I was pressed for time (Just got back from vacay! Woohoo!), I decided to skip challenging myself too much with needle and thread this time around and decided to upgrade some fabric I already had.
In last month's challenge, I told you about how our family room is full of my old college decor, and my tastes of drastically changed since then. I am slowly revamping this room, getting rid of the old black and silver decor and substituting it with minty shades and lighter/brighter accents. I have these old black throw pillows that I think I bought at Home Goods years and years ago. I decided they would be the perfect fabric item for a little facelift instead of buying new pillows!!!
I wasn't exactly sure how painting them would turn out, but I decided it was worth the risk since I had planned on replacing the pillows anyway. If it turned out awful, I could always donate them so someone else could try to give them some love, and then buy new pillows. To my surprise, it didn't turn out awful at all!
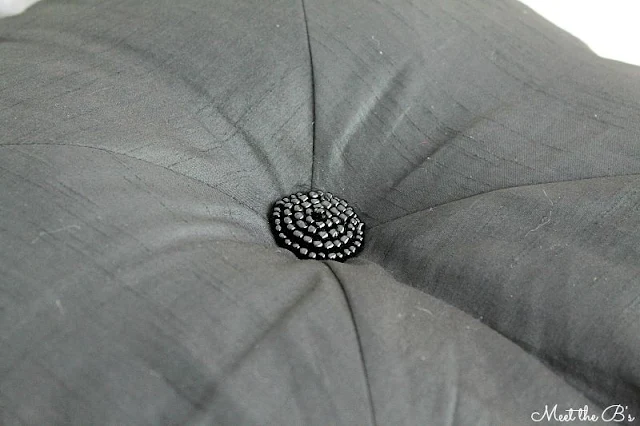
First, I cut off the old beaded buttons. The one pictured here can be salvaged for another project. The button on the other pillow however, has been losing beads for a while. Mr. Pillow was soooo ready for an update!
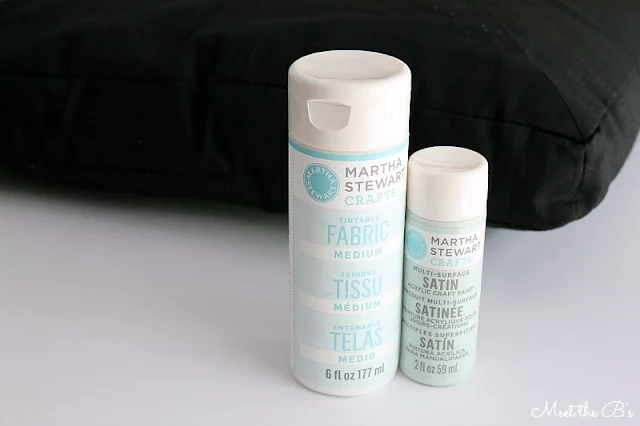
I decided to try Martha Stewart's fabric medium.* Sounded easy enough. You just add it directly to the paint of your choice. I chose a multi-surface paint in a color that closely matched the mirror I painted last month. The color is Martha Stewart's "cloud."*
I followed the instructions and mixed two parts paint to one part fabric medium. FYI, if you are doing more than one pillow, you're going to need a whole lot more paint! While the fabric medium goes a long way, I used about one and half bottles of Martha Stewart's 2 oz. bottles of paint per pillow.
I used a paint brush to apply it to the pillow. If your fabric is textured, like mine, try to go with the grain of fabric so that brush marks don't show. Try to work quickly because the first coat will soak into the fabric fairly fast.
Here's the pillow after one coat. Like I said, the first coat soaks in a lot, so you definitely need two to three coats depending on the color of fabric underneath and type of fabric. Once you have the first coat done, it sort of serves as a barrier when applying the next coats.
While waiting for the first coat to dry, I worked on my new buttons. I found two replacement buttons in a similar size of the old ones. Unfortunately, I couldn't find any buttons in a color I liked, so I decided to paint the buttons too! Why not?! I found some pretty vintage looking buttons and applied the same multi-purpose paint to them. It took two coats to cover them and they dried quickly.
I applied two more coats of my fabric paint mixture, drying in between coats, and then allowed it to dry overnight. Then I used embroidery thread and an embroidery needle to attach the new buttons.
The fabric is definitely a little stiff at first, but following the directions on the fabric medium bottle, you can allow to cure for 24 hours, heat set, and then wash and dry on gentle settings to loosen up the fabric. Depending on your washer and dryer, this might be difficult to do with a pillow, so you can always hand wash in a sink or tub after heat setting with low heat iron or hair dryer.
I'm pretty amazed at what a big difference it made to have brighter pillows in the room! It was so easy to paint them, and I can't wait to try this easy fix on something else!
See all of my friends fabric projects below!

>>> See where I link up each week! <<<


WOW! I've never really thought of painting fabric, but I absolutely LOVE how this turned out Nicole! BRILLIANT!
ReplyDeleteIt never occurred to me to paint pillows before. You've convinced me! These definitely brighten up your space :-)
ReplyDeleteVery nice, Nicole! That's great that you didn't have to buy a new pillow! Love the button you added, too. Great job!
ReplyDeleteThis is one thing I have yet to try and I think you've convinced me I need to! Such a better alternative to re-upholstering!
ReplyDeleteWhat a fun way to update an old pillow! It looks amazing! They really pop against the sofa now. And I love those new buttons.
ReplyDeleteSo cool! I've always been a bit terrified to try to paint fabric, but it's good to know that there are ways to soften it up afterward. This makeover looks so great!
ReplyDelete