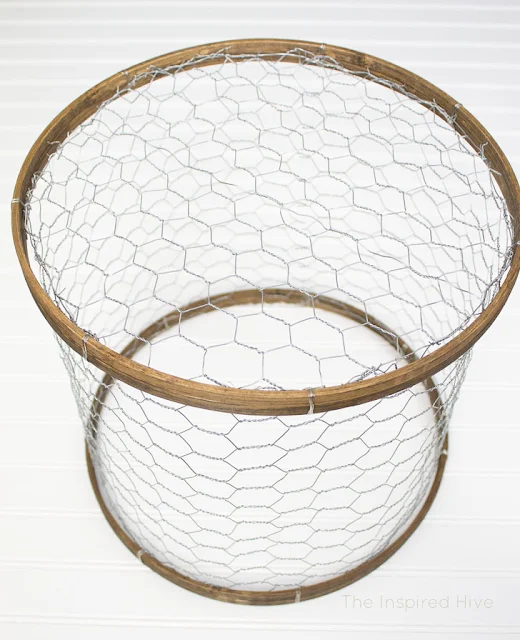
Another piece of the laundry room is done, y'all! I am so excited about this project! I've been daydreaming about this DIY light fixture since 2013! This is inspired by this one at The Woodgrain Cottage. I started brainstorming our laundry room build years ago and stumbled upon Shayna's light when skimming through Pinterest for rustic/industrial laundry rooms. From the moment I saw it, I decided I would be making my own version for our new laundry space!
Several years later, here's how I finally created mine...
*Affiliate links included for your convenience.
See my full disclosure policy.
Materials:
How to make a chicken wire light fixture:
I started out with four embroidery hoops. I originally wanted to just use two thick ones, but the only ones I could find had the screw clamps glued on, and it was impossible to remove them without damaging the wood. So, instead I used the inner hoops of four thin embroidery hoops.
I gave them a coat of my favorite stain.
Once the stain was dry, I used some thin silver floral wire to attach two hoops together to create that thick look I was going for. I tried to space the wire equal distances apart. I followed the same process with the other two hoops.
Next, I cut the chicken wire to size. To find the right length, I unrolled the wire around the inside edge of one of my embroidery hoops and cut where the ends met. To find the right height, there was conveniently a support wire running across the halfway point of the roll. I decided to cut along there to make things easy. This made my light fixture 12 inches tall. I used my favorite multi tool to make the cuts.
To attach the chicken wire to the embroidery hoops, I used more floral wire. I made sure to attach it in the same spots that already had wire on the hoops. I actually liked how the wire was looking, so I wrapped around a little extra to make it stand out more.
The most difficult part was the top of the light fixture. To cut it to size, I rolled it out flat and held it above my light fixture. Then, I had my husband cut all the way around while I held the chicken wire flat. When cutting, we left a little excess which we then bent downwards to tuck the piece into the inner hoop. Then I used more floral wire to attach the top piece to the rest of the chicken wire.
Once everything was attached, I tightened any lose areas and cut the ends of excess floral wire. I also wrapped some of the excess ends around the chicken wire to hide them.
Hanging the light fixture was actually really easy. I thought for sure we would have to cut a hole in the top of it, but we just threaded the pendant light's cord through the center of the fixture before wiring the light. The chicken wire is strong enough to hold steady hanging on the pendant light.
I am so in love with our new light fixture and am thrilled that my vision is finally coming together! Having a separate laundry room is oh-so-wonderful! And I love the touches of rustic and industrial that are coming together so nicely. This light fixture really helps tie it all together!
See the rest of the laundry room:

*This post may contain affiliate links. See my full disclosure policy.
Laundry Room Reveal
Farmhouse Kitchen Makeover
You may also like...
Laundry Room Reveal
Farmhouse Kitchen Makeover


What a fun idea with the chicken wire, I just made a cute heart for succulents with chicken wire.
ReplyDeleteI would like to invite you to stop by and share what you have going on with my readers on the Friday Features party as well!
Love this fixture, Nicole! What a great idea! Hope you have a great week! xo
ReplyDeleteKendra @ www.joyinourhome.com
Such a great DIY! Love this light fixture! You made it look so easy. I may need one! Stopping by to let you know you are being featured on Friday’s P3 Party post! Have a great week! Thanks for pinning!
ReplyDeleteBest,
Kim
I love it! You have inspired me to make one! I'm so excited. Thank you.
ReplyDeleteI love it! You have inspired me to make one! I'm so excited. Thank you.
ReplyDelete