How to DIY the skinny shiplap look for modern farmhouse style
If you saw the reveal for our modern farmhouse kitchen makeover, you know my favorite part of the whole room is the skinny lap wall. Creating this thin shiplap wall required a little hard work, but my husband and I got it done and now it's my favorite part! Today, I want to share the tutorial!
Paint for this project was provided by Sherwin-Williams. This post also contains affiliate links for your convenience. For more information, see my disclosure policy.
Related posts:
- Where to buy skinnylap
- Modern farmhouse kitchen makeover
- How to cut your own faux planks for shiplap
- Free printable eucalyptus art
- Easy DIY farmhouse chalkboard
What is skinnylap?
We all love a little shiplap, right? The best thing about it is that it doesn't have to just be for farmhouse style rooms. It works well in rustic, bohemian, and coastal styled spaces as well. It can be used for so many types of rooms! After adding some to my son's bathroom, I thought I wanted to install some faux shiplap in the kitchen too. But once I saw this photo on Joanna Gaine's Instagram this past summer, my heart was set on skinnylap.I couldn't find any other examples or tutorials for "skinnylap" or "shiplath" at the time, and wasn't quite sure how to go about it. After a little research, I realized that you could order wood lath from Home Depot. They didn't sell it in any of our local stores, so I couldn't go look at it person, but I decided to bite the bullet and order it (FYI- if your local store carries, you can save yourself some time by ordering online for pick up in store). I have to say, when it arrived, I was a little shocked at first. It was nothing like Joanna's perfectly smooth and sleek lath in her Instagram photo. It was really rough and rustic looking. Despite my initial disappointment, I decided to go with it, and I'm so glad I did! Although it's very different from the photo that inspired me, it feels so much more me!
This skinnylap lath wall totally brightened up our kitchen. I love how unique each and every piece is. It gives it so much character! It's hard to tell in photos, but in person, each piece of lath has different cuts and grooves from when it was ripped down by the manufacturer. I love it!!!!
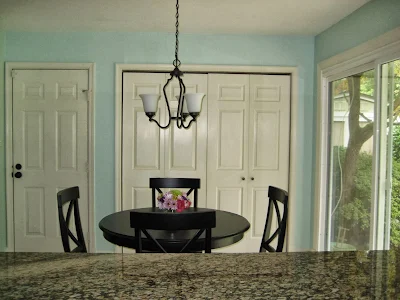
First, here's what this wall looked like right after we moved in.
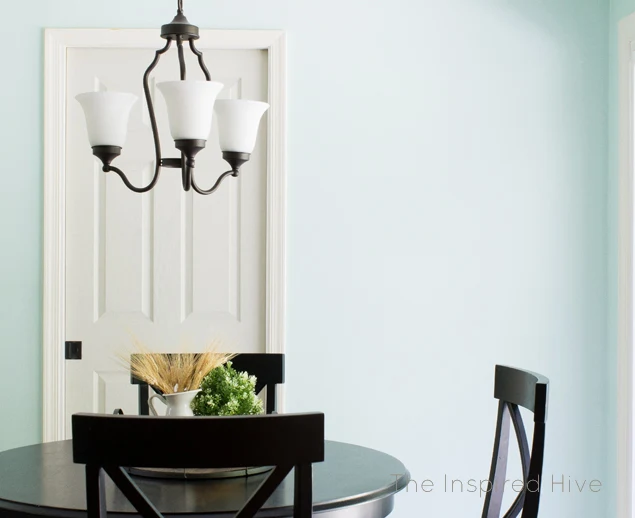
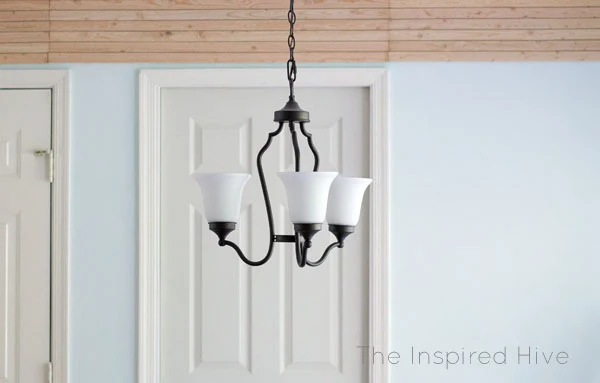
Here it is after we removed the bi-fold doors and installed a pocket door.
And here it is now.
Ahhh! Do you see why I'm so excited??! Okay, here's how to make your own...
Materials:
- Lath (we used 2 boxes for a 50 square foot wall)
- Wood filler (I prefer this color changing one!)
- Sanding sponge (80-100 grit)
- Brad nailer
- Roller
- Purdy XL Cub brush
- Primer
- Paint (Sherwin-Williams "Alabaster")
- Razor blade
How to install a skinnylap lath wall:
To create this wall, first we ordered lath from Home Depot. Then we had to sand each piece on one side. We used sanding sponges for this and went through three to four of them.Then, starting at the top of the wall, we used this awesome Ryobi AirStrike brad nailer (seriously my absolute favorite power tool!) to attach the boards to the wall. You could stagger them, but I wanted them to look continuous across the wall and planned on using wood filler between the ends to hide the cuts. We used a leftover piece of balsa wood as spacers between rows, but you could also use coins as we did with our first shiplap wall.
Once all of the pieces were up, I rolled on the first coat of primer using my Purdy roller. I wanted a quick coat on mostly to allow me to see areas that needed to be filled better. After it was rolled on, I applied wood filler in between the cut ends to create that long continuous look I mentioned. After it dried, I did a quick sanding of those areas with a sanding sponge. If you stagger the pieces, you can skip this step.
It's hard to get good coverage with a roller on such perfectly imperfect wood, so after the first quick roll on coat, I went back with my Purdy brush and did a second coat of primer carefully cutting in along the corner, trim, and ceiling edges. The angle of the Purdy XL Cub makes it really easy to paint along the edges without getting paint on the trim or adjoining walls. I recommend two coats of primer to prevent knots in the wood from showing through later down the line (somehow they sneak their way out over time!).
Then, I painted the first coat of paint using Sherwin-Williams Emerald paint in "Alabaster." It's hard to choose a white paint, but I felt this swatch went perfectly with the walls ("Eider White") and the cabinets ("Agreeable Gray"). The Emerald paint is a paint and primer in one with exceptional durability (perfect for a kitchen!). I was excited about the primer being included because this gave me additional stain blocking power against the knots in the wood.
As I brushed the paint on, I tried to smooth out any drips between lath strips, but some drips are inevitable due to the thickness of the lath.
I was hoping as I a painted, the nail holes would naturally fill in with paint, but they didn't. I debated whether or not to fill in all of the nail holes with wood filler, but sanding them all afterwards sounded like too much work. So instead, I decided to go back using a small craft brush to fill them in with paint. I'm glad I chose this method because it took way less time. From far back, the holes blend right in, and up close you can hardly see the little divots from the filled holes, but the ones you can see just add to the rustic character. If you want a perfectly smooth look though, make friends with the wood filler.
Next, I brushed on one last coat of paint. My husband and I went back with a razor blade and cleaned up any dried drips between the lath strips. You can see the dried drips we had to remove in the photo below (along with some of the cool patterns in the wood from when it was originally ripped down!).
And that's it! It was so easy to create this skinnylap feature wall!
Once we got into the groove of it, it went pretty quickly. The brad nailer made installing a breeze, and painting went quickly with my husband starting at one end and me at the other. This wall made such a big impact in our space, so I am so glad I found those lath pieces from Home Depot! It was well worth the effort!
See more of our kitchen:


Why didn't you use BIN or something similar on the knots? Wouldn't that have been easier than umpteen coats of primer?
ReplyDeleteThanks for your concern. Based on my experience, I always do two coats of primer on any raw wood no matter which primer product I am using. I have tried many primers including BIN and always have stains from knots show up a few years later, so I prefer to use an extra coat to ensure good coverage.
DeleteAbsolutely beautiful wall,beautiful job. One thing though, I would have opted to sand AND prime and paint the lath on saw horses before installation. This leaves only the nail gun divots to paint as you did plus an occasional touch up for fingerprints, etc. AND no drips between boards.
ReplyDeleteHi there! Thanks for stopping by! We did consider that method in order to avoid dripping, but because the lath pieces are so thin, it would have taken a very long time to paint them all on a saw horse. Painting once installed was a lot less time consuming and worth the drips that can be cleaned up with a razor blade. However, if I were to do this again, I think I would tape off the other walls once the lath was installed, and use my paint sprayer instead. Much faster, and no dripping!!! Win, win!
DeleteI was wondering what size brads did you use to make sure it was secure.
ReplyDeleteHi, Jeff. Sorry for the delay, I didn't see your comment until now. We used a combination of 3/4 inch and one inch brad nails. Because of the pocket door, we had to go with 3/4" for the majority of it so that we wouldn't nail into the door. The lath strips are very light, so they were pretty secure.
DeleteDo you think you could have glued instead of nail?
ReplyDeleteYes, in fact, we did use glue in a few areas directly above the electrical outlet for safety reasons. However, I would not glue the entire wall if you think you may ever want to take it down. It is much easier to fill nail holes than it is to remove glue :)
DeleteI love your skinnylap wall! Can't figure out why critics pop up for such an awesome project! Thanks for sharing!
ReplyDeleteThank you so much for your kind words! It's one of my favorite projects :)
Delete