How to paint laminate furniture
This post is sponsored by FAT Paint Company.
This post may also contain affiliate links for your convenience. For more information, see my disclosure policy.
This post may also contain affiliate links for your convenience. For more information, see my disclosure policy.
You might also love:
- How to polish antique brass hardware
- How to build a custom size farmhouse table
- How I turned a dresser into an entertainment center
- Ikea Malm dresser hack
Because of our massive to do list, I did have to postpone my project until we finished getting our house ready to put on the market. Once that was done, I hauled my 38 week pregnant belly outside and got to work on an old laminate TV stand from our master bedroom that I've had for about seven years. The dark finish is so not my style anymore, and I've contemplated replacing it with a new piece a few times, but when life hands you a beautiful paint color, you give something else new life!
I was so excited to try out FAT Paint because I had heard such great things about it, and I love how the media stand is looking now! Plus, I went into labor the next day, so I think the baby must have liked FAT Paint too 😉
Materials:
- fine grit sanding sponge
- rubbing alcohol
- soft cloths
- spray primer
- paint brush
- FAT Paint
- CLEAR Top Coat
How to paint a laminate media center:
Here's what our TV stand looked like before. It was black laminate with a wood grain pattern printed on it.First I prepped the surface.
The tricky thing about laminate furniture is getting the paint to stick to the surface and not chip/scratch easily.
To prep the surface, use a fine grit sanding sponge or sandpaper to lightly scuff up the laminate. This will help the paint adhere.
Be careful not to sand too much or you will sand through the laminate finish.
Then dust off the furniture with a soft cloth to remove all sanding dust (some people like to use a tack cloth here, but I don't find this necessary with my next cleaning step- but if you have tack cloths on hand, it definitely won't hurt!!!).
Next, clean any dirt, finger prints, etc. from the furniture. I prefer to use a clean cloth and rubbing alcohol. The alcohol will remove any greasy or sticky residues as well as oils from your fingers, plus it dries instantly.
If you don't have alcohol on hand, you can also use warm soapy water, but be sure to allow to dry completely.
(Update- I now use TSP for cleaning furniture before painting. Alcohol will still work fine! TSP has just become my preference)
With laminate furniture, it's important to take the extra effort to prime your piece.
I decided to use a spray primer to make this part quick and easy.
I did two coats, allowing to dry in between, and rotating the furniture to spray the insides of the cabinets.
Once the primer was dry, I did another quick sanding, dusted it off, and then I was ready for the fun part... the paint!
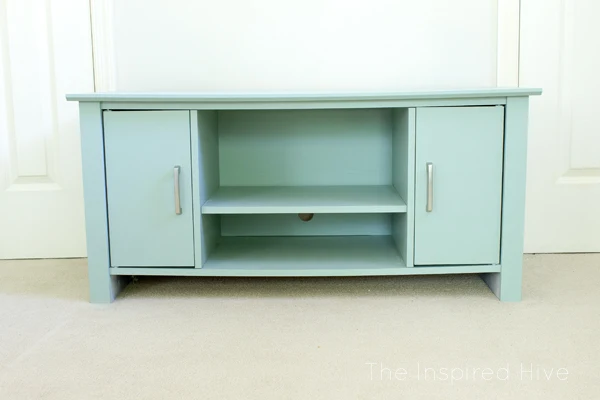
Can I just tell you how much I love this color? It's called "Ocean Spray" and it is gorgeous! It ended up being a perfect match for our bedroom.
After the sanding and priming, I realized my big pregnant belly couldn't handle bending over to paint, so I had my hubby put the TV stand on top of our work bench in the garage. Soooo much easier!
I put the first coat of paint on using my favorite paint brush.
The paint went on really smoothly. And the best thing about FAT Paint is it's low VOC which meant it was safe for me to use while pregnant. Yay!!!
After the first coat dried, I used my sanding sponge to lightly sand between coats.
Then I applied a second coat of paint. It was pretty humid on the day I was painting, so I decided to let it dry overnight before applying the top coat to ensure that it was thoroughly dry.
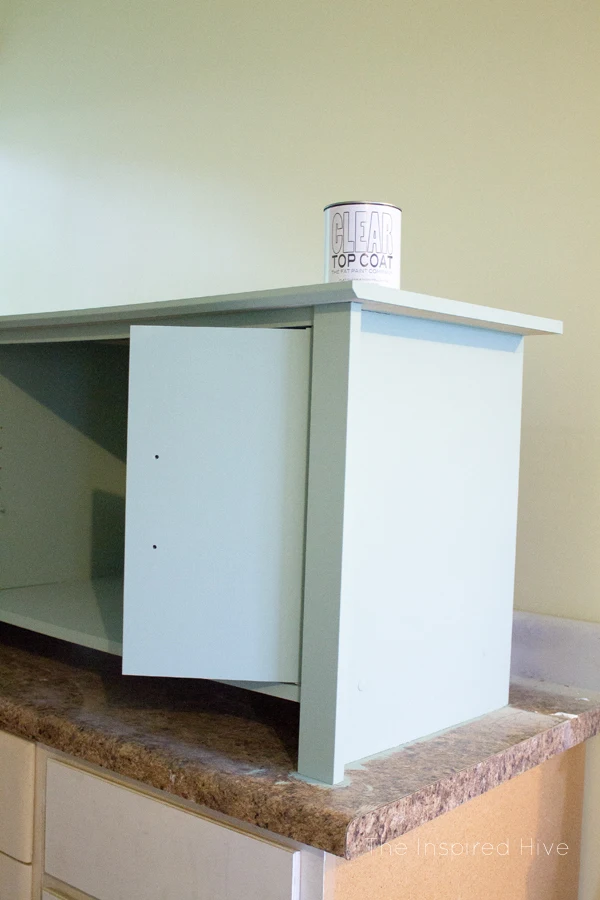
In the morning, I applied the top coat.
The Fat Paint Company's CLEAR Top Coat is a non-yellowing finish that gives you a more durable surface.
I found that it was best to work quickly when applying the top coat. I quickly brushed it over the entire surface (one side at a time) and then went back over the section with long brush strokes to get an even finish.
I applied a second coat to the "high traffic" areas like the top and doors.
Overall, I'm really happy with how it turned out!
I absolutely love the paint color and the paint was great to work with!
I wish I had had more time to work on it because I would have loved to replace the hardware. Once I started painting, I also realized how warped the top is and thought it would look awesome to replace the top with some stained wood planks in a driftwood finish, but baby Jack arrived (with the craziest story) and there was suddenly no time!!!
Even without those additions, it looks soooo much better in our room!!!
Interested in trying your own FAT Paint project? Stop by The FAT Paint Company's website to find a retailer near you. If there's not one in your area, check out the Finder's Fee program. FAT Paint Company is giving away $200 in CASH to anyone who helps them make a connection with a new retailer! Share the FAT love with your favorite shop!
Check out 11 other furniture makeovers:


That colour!!! LOVE it Nicole!
ReplyDeleteThat color is so perfect and totally you! Crazy how much a little paint can do :) And congrats on the arrival of baby Jack! :)
ReplyDeleteWow this color turned out amazing!!
ReplyDeleteI love how this turned out!! That color is so beautiful! :)
ReplyDeleteSuch a pretty color, Nicole! Love your ideas for a part 2 makeover but it really looks fantastic as is!
ReplyDelete