Big thanks to Kreg for sponsoring this challenge! All opinions are my own.
This post contains affiliate links for your convenience. For more information, see my disclosure policy.
When the R3 Kreg Jig arrived in the mail, I have to admit, I was pretty intimidated. I thought for sure this project was going to be a major fail. This little tool looked so complicated! But I read through the instructions a few times and watched this quick video (using a different Kreg jig), and suddenly it all made perfect sense. It wasn't complicated at all! In fact this little gadget made the whole project go so quickly! I did enlist some help from the hubby now that we've got two little munchkins. This project was a team effort for sure, but only because of our current circumstances. It can definitely be a one person project. I'm here to tell you, don't be afraid. You can do this! If I can build furniture, you definitely can!
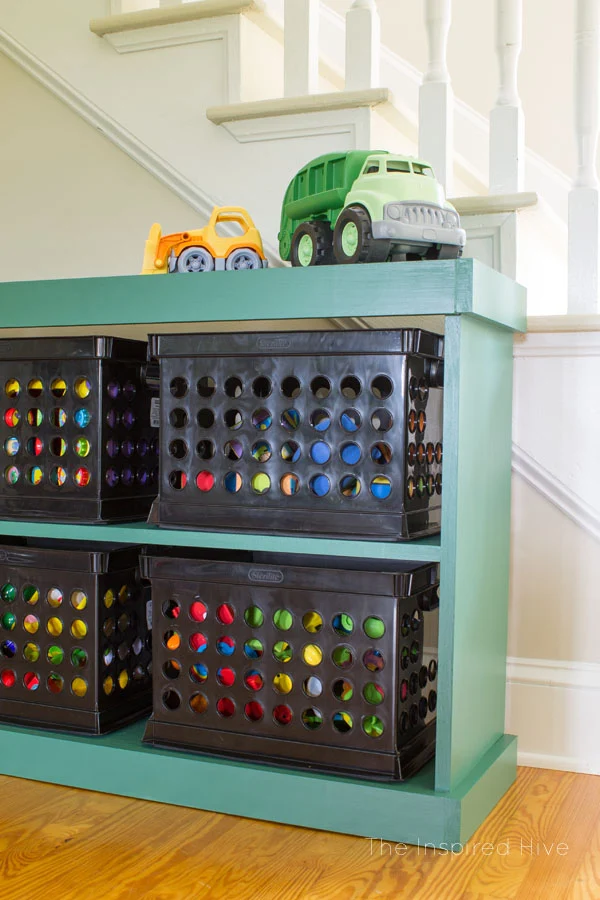
I showed you the rooms in our new house we plan on updating first, and one of them is the playroom. I plan on tackling the playroom for the One Room Challenge this fall, but I couldn't pass up the opportunity this month to build some custom toy storage for the space. I'm thrilled with how it turned out, and it's making me so excited to get started on the playroom makeover next month so I can see the finished look!
I showed you the rooms in our new house we plan on updating first, and one of them is the playroom. I plan on tackling the playroom for the One Room Challenge this fall, but I couldn't pass up the opportunity this month to build some custom toy storage for the space. I'm thrilled with how it turned out, and it's making me so excited to get started on the playroom makeover next month so I can see the finished look!
Materials:
- Four 1" x 12" x 6' pine boards (Time saving trick- Did you know you can order your lumber online and pick it up in store?)
- Three 1" x 3" x 6' pine boards
- Measuring tape
- Carpenter's square
- Circular saw
- Kreg jig R3
- C-clamp or Kreg clamp
- Cordless drill
- 1.25" pocket hole screws
- Brad nailer
- 1.25" brad nails
- Wood filler
- Putty knife
- Sand paper
- Primer
- Paint- SW Kendal Green
- Top coat
- Storage crates
How to make a toy storage shelf:
Okay, let me preface with two things... a) Pretty please pardon our old ugly falling apart wood patio full of pine needles in these photos. It's high priority on the new house to do list for sure 😉 b) Pretty please excuse our high quality building plans in the photo below 😂 We aren't afraid to admit we are amateurs, y'all! But considering we've never built furniture before, I had a baby strapped to me in the Baby K'tan, and we had a toddler "helping" us, I am pretty impressed that we were able to build a sturdy piece of furniture!Alrighty... so here's our cut list shown below. We used four 1" x 12" x 6' boards and three 1" x 3" x 6' boards. I will admit, we made a small error. Our goal was to minimize cuts to save time due to the baby/toddler situation, but once we started putting it together we realized we actually should have taken 1.5 inches off of the top shelf (70.5" total) and 3 inches off of the middle and bottom shelves (69 inches) to accommodate the 3/4 inch thick trim for a nice clean edge on the front corners. So you can adjust accordingly if you would like, but again, baby and toddler here... we did not rebuild! But we've made a mental note for next time. 😉
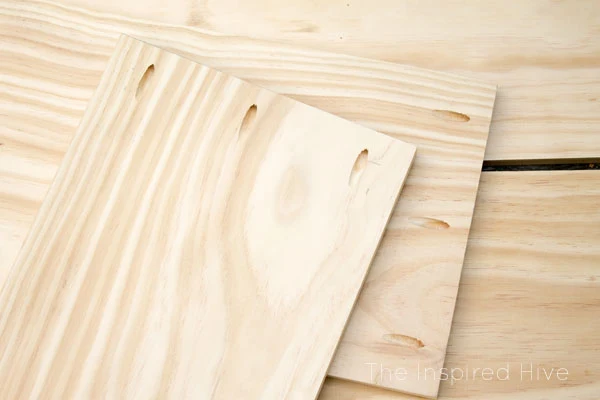
The red asterisks below represent where we drilled our pocket holes. Three on each side of the middle and bottom shelves, and three on the top edge of each side piece.
Use a measuring tape, carpenter's square, and pencil to mark your cuts. Measure twice, cut once. 😁
Once you have cut all of your boards with your circular saw, prep your Kreg Jig. The R3 comes with a handy little guide that tells you what size screws you need and what to set your drill depth to. Since our boards' actual thickness was 3/4", we used 1.25" pocket screws and set our stop collar to 3/4" as shown below. The top of the collar should sit at the mark for your wood thickness.
Adjust the positioning sliders on the jig to match your wood thickness as well, and clamp it onto the edge of your board. Follow the instructions in your user guide to determine how far from the edge to place the jig.
We used a regular c-clamp because we unfortunately couldn't find the Kreg clamps in our local stores, but you can shop ahead and get them online here. Having the jig clamped down will make the process go so smoothly, but if you don't have a clamp of any kind, there is also a spot for screwing the jig to your project to hold it in place.
Attach the drill bit with the adjusted stop collar to the drill and insert it into the jig. Use an in and out motion to clear out the sawdust as you go.
Stop once you get to the stop collar.
Once you remove the drill and jig, you will have a nice neat pockethole! After you've done one and gotten the hang of it, it's smooth sailing from there. You'll fly through the rest of the pocket holes.
Next, use the included drill bit to install the pocket screws. Line up your boards, and either have someone hold them steady or use a corner clamp, then install the screws into the pocketholes.
We installed the side pieces into the top piece first.
Then we measured and marked where the middle and bottom shelves should go. We installed them on each side from underneath.
Tah dah! It stands!!! We were so relieved to see that our first furniture build was actually functional.
Next, we added the trim. We used a brad nailer to frame out the shelf with 1" x 3" boards.
After that, I filled nail holes, sanded, primed, painted, and applied a clear top coat. (Hoping it can withstand two wild little boys, I bought this heavy duty top coat at the recommendation of my good friend Amy from Canary Street. I consider her an expert on all things furniture!)
And now we have a perfectly organized, sturdy, custom toy storage shelf for the playroom!
I can't wait to get started on the playroom, so we can really put this shelf to use!
I am so proud of our newly learned skill! I never would have thought we could actually build a sturdy piece of furniture. The Kreg Jig R3 might just be my new favorite tool. The possibilities are endless. Now that I know how easy it is to use, I haven't stopped daydreaming of new ideas!
Kreg has so many cool products. I would love to get my hands on the Rip-Cut and Accu-Cut to make ripping large sheets of plywood so much easier!! We cut our own faux shiplap from plywood before, and these tools would have made it go even smoother! I think I see some more faux shiplap in our future 😉
Ready to see more Kreg Jig ideas?
Check out 12 other pocket hole project ideas:

Giveaway
Kreg is generously giving TEN lucky readers a chance to win an R3 kit! Use the Rafflecopter widget below to enter.a Rafflecopter giveaway
Pin it for later...


This is the perfect storage shelf for all the kid's toys!! I love the color you chose to paint it, too. Super cute, Nicole!! :)
ReplyDeleteYou guys did a great job, Nicole! It looks fantastic.
ReplyDeleteI seriously need to build one of these! I hate all the toy clutter!
ReplyDeleteLooks fantastic Nicole! Perfect for all the boys' toys!
ReplyDeleteLook at your adorable toy storage shelf! So proud of you, Nicole! That's a big project, especially with two little guys around!
ReplyDeleteI would love to get started on making furniture like this with one of these tools!
ReplyDelete